In this tutorial you will learn how to quickly setup FileZilla to remotely manage your files for websites running on Google Cloud Platform. This is quick-start tutorial is designed for websites running on Google Cloud’s compute engine.
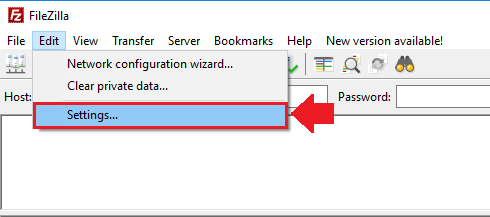
Setting up FileZilla FTP is a quick and easy way to remotely manage your website’s files.
To get started, follow along with the video above. If you get stuck, check below to see the steps listed individually with images.
Before starting this tutorial, you should have already created a Google Cloud Platform account and launched a website on the Google Cloud Platform Compute Engine.
There are 7 steps in this tutorial:
1. Download PuTTY and FileZilla

The first step in this tutorial is to download PuTTY and FileZilla.
Putty is an SSH client and key generator. You will use this application to generate a private/public key pair and establish a secure connection between your Google Cloud Platform instance and FileZilla.
FileZilla is the FTP Client that we will use to securely manage our Google Cloud website’s files straight from our desktop.
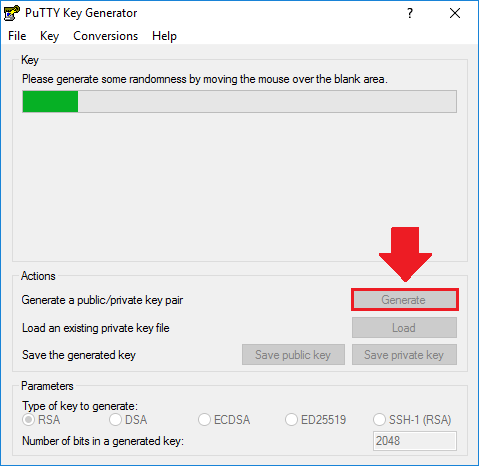
2. Generate SSH Keys
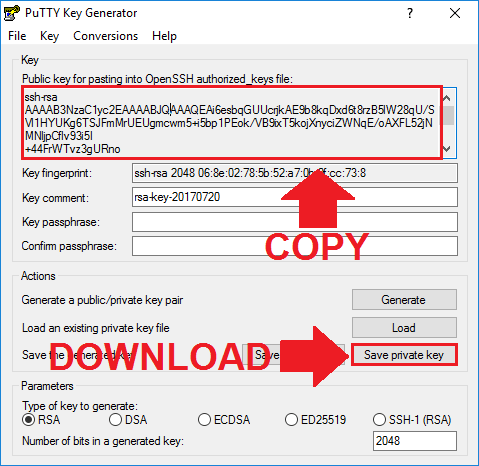
3. Copy and save the keys
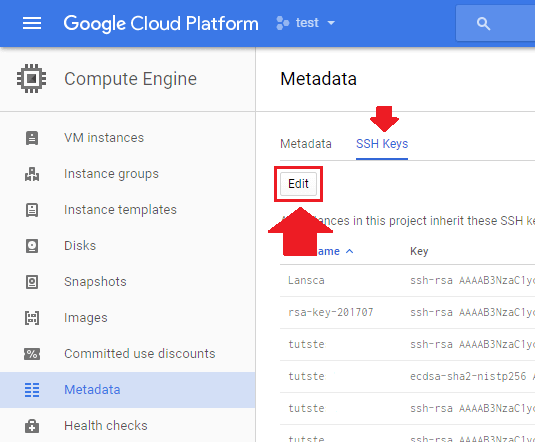
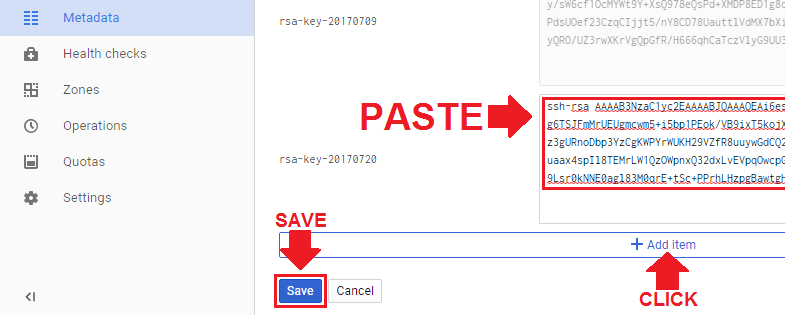
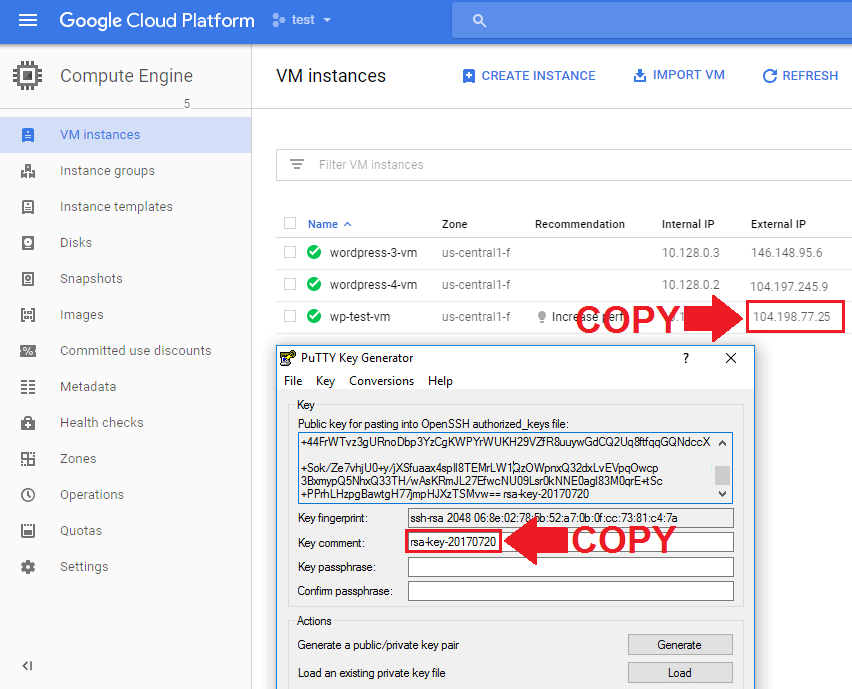
4. Paste Public Key in Google Cloud
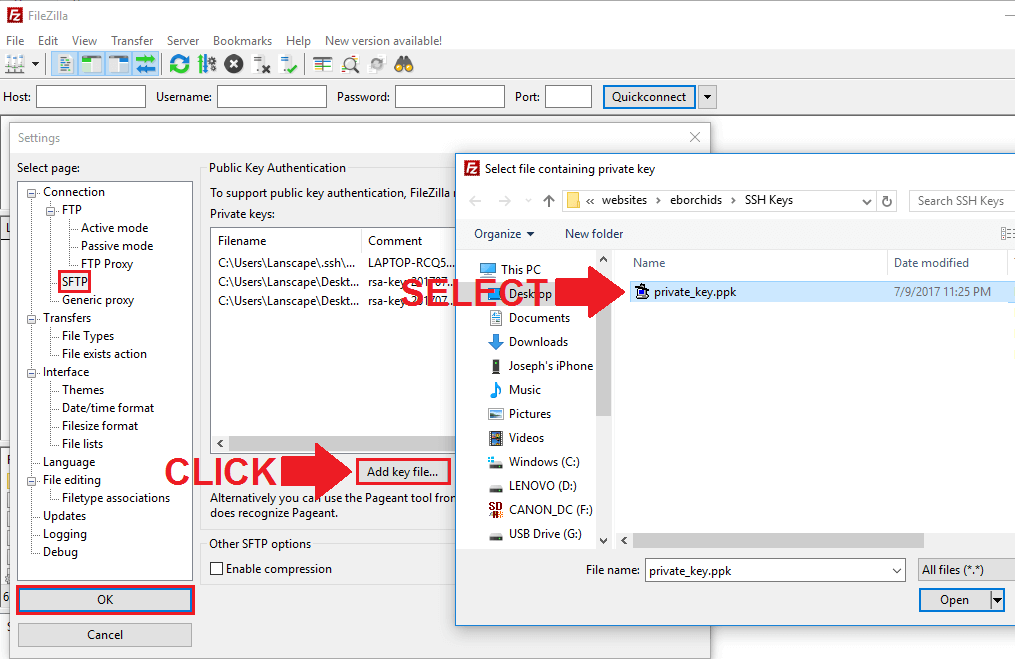
5. Upload Private Key in FileZilla
6. Establish Connection to Google Cloud
In order to establish a connection between Google Cloud and Filezilla, you will need both the IP Address to your instance, and the username for your SSH Key.
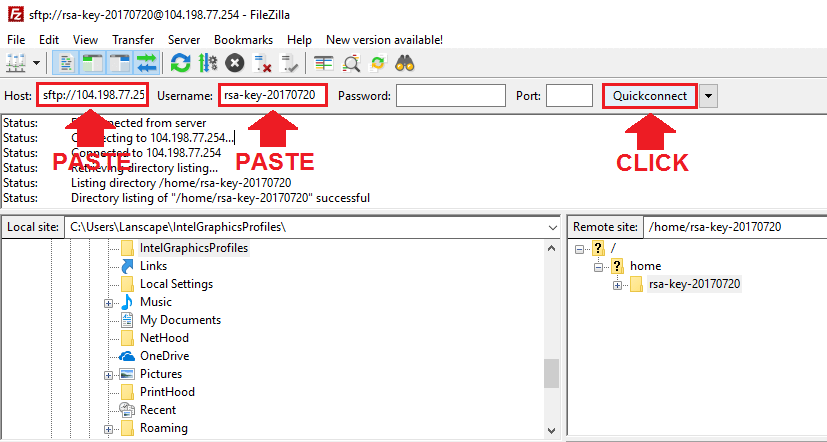
Lastly, click the Quickconnect button.
7. Navigate to your root directory
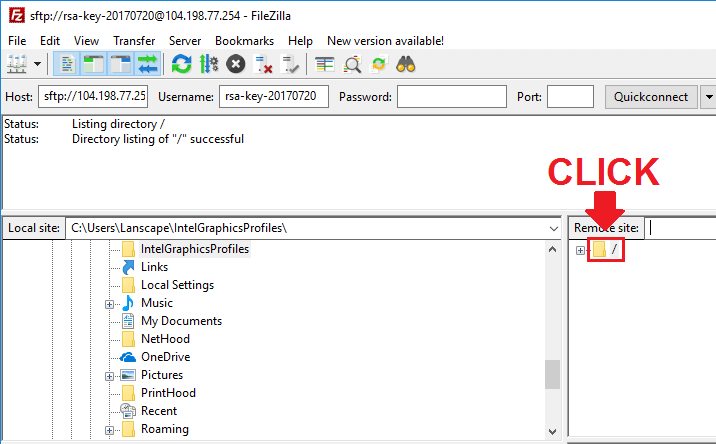
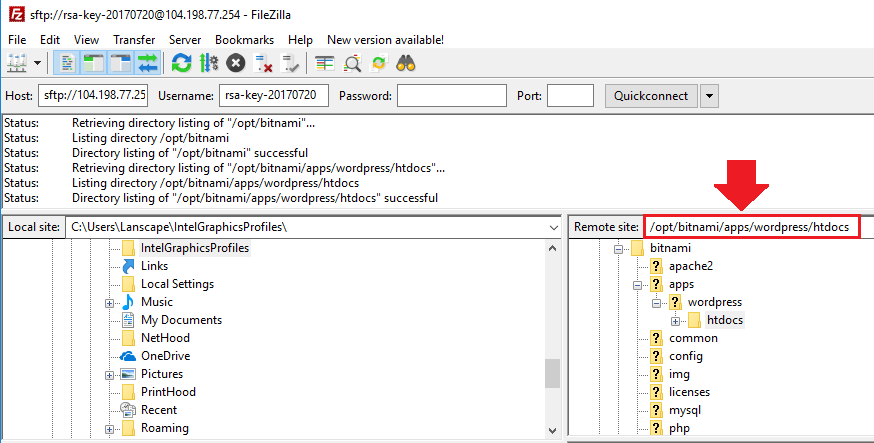
If you’re running the Bitnami version of WordPress on Google Cloud, your root directory is located at:
/opt/bitnami/apps/wordpress/htdocsIf you’re running the Click-to-Deploy version of WordPress on Google Cloud, your root directory is located at:
/var/www/htmlThat’s it!
If you run into permission errors, click here to fix the problem.
If you are looking to configure your SSH Keys using the Cloud SDK gcloud command-line-interface, you can check out that tutorial here.
0 Comments